When you run an app in development or testing, it can be okay for session data to be lost during app restarts.
However, in production this is rarely okay. That is why the default in-memory cache will not be able to support your session data. All data in it will be lost if the app process is stopped.
Another reason why in-memory session state is often avoided is that applications may be run on a web farm. In this case multiple instances of the app exist, and a user might connect to any of them. One way to solve this problem is session affinity. Then a user would always connect to the same instance. But what happens if the instance goes down?
If you cannot guarantee that the user can always connect to the right instance that will have their data, it is better to store the session data outside the instances.
In this article, we will look at how to use Redis as a session data store.
Redis in development environment
To use Redis cache locally, I installed the 64-bit version of Redis for Windows via Chocolatey: https://chocolatey.org/packages/redis-64/.
After installation, I started it by running redis-server.
In this case I used appsettings.Development.json to hold the development-environment connection string.
{
  "ConnectionStrings": {
    "Redis": "localhost"
  },
  "Logging": {
    "IncludeScopes": false,
    "LogLevel": {
      "Default": "Debug",
      "System": "Information",
      "Microsoft": "Information"
    }
  }
}
Setting up an ASP.NET Core app to use a Redis distributed cache + sessions is pretty easy.
It requires a few things in the Startup class:
public void ConfigureServices(IServiceCollection services)
{
    services.AddMvc();
    //Add services needed for sessions
    services.AddSession();
    //Add distributed cache service backed by Redis cache
    services.AddDistributedRedisCache(o =>
    {
        o.Configuration = Configuration.GetConnectionString("Redis");
    });
}

public void Configure(IApplicationBuilder app, IHostingEnvironment env)
{
    if (env.IsDevelopment())
    {
        app.UseDeveloperExceptionPage();
        app.UseBrowserLink();
    }
    else
    {
        app.UseExceptionHandler("/Home/Error");
    }

    app.UseStaticFiles();

    //Enable sessions
    app.UseSession();

    app.UseMvc(routes =>
    {
        routes.MapRoute(
            name: "default",
            template: "{controller=Home}/{action=Index}/{id?}");
    });
}
The important ones here are services.AddSession(), services.AddDistributedRedisCache(), and app.UseSession().
app.UseSession()must be called before middleware that require access to session data.
The session store automatically uses whatever distributed cache is available, so utilizing Redis for it requires no additional configuration.
Here is an example of session data usage in a controller action:
public async Task<IActionResult> About()
{
    //Load data from distributed data store asynchronously
    await HttpContext.Session.LoadAsync();
    //Get value from session
    string storedValue = HttpContext.Session.GetString("TestValue");
    if (storedValue == null)
    {
        //No value stored, set one
        storedValue = "Testing session in Redis. Time of storage: " + DateTime.Now.ToString("s");
        HttpContext.Session.SetString("TestValue", storedValue);
        //Store session data asynchronously
        await HttpContext.Session.CommitAsync();
    }
    ViewData["Message"] = "Value in session: " + storedValue;

    return View();
}
Here we use LoadAsync and CommitAsync to load and save data to/from the distributed data store, in our case Redis cache.
Data will be loaded synchronously if you do not. Exceptions during load will be captured and logged. You can see it here in the source code.
By using the two asynchronous functions you get exceptions if there are connection problems, instead of just a log message.
Call
await HttpContext.Session.LoadAsync()before accessing session data andawait HttpContext.Session.CommitAsync()after modifying data
A cookie called .AspNetCore.Session is used to track the session by default.
You can change the cookie name as well as other settings in AddSession:
services.AddSession(o =>
{
    o.Cookie.SecurePolicy = CookieSecurePolicy.Always;
    o.Cookie.Name = "MySite.Session";
    o.Cookie.HttpOnly = true;
});
Using Azure Redis Cache
In production I will use Azure's Redis Cache service together with an Azure Web App.
Creating a Redis cache is pretty straight-forward. You can find it in the Azure Portal from New -> Databases -> Redis Cache.
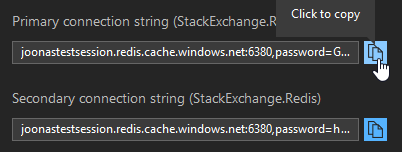
Once it has been created, you can find Access Keys from its blade.

Copy the primary connection string.
After opening the Web App's blade, we need to open Application Settings. Under Connection strings, we must specify Redis as the name, and the connection string as the value. The name must match the name of the connection string property in the configuration.
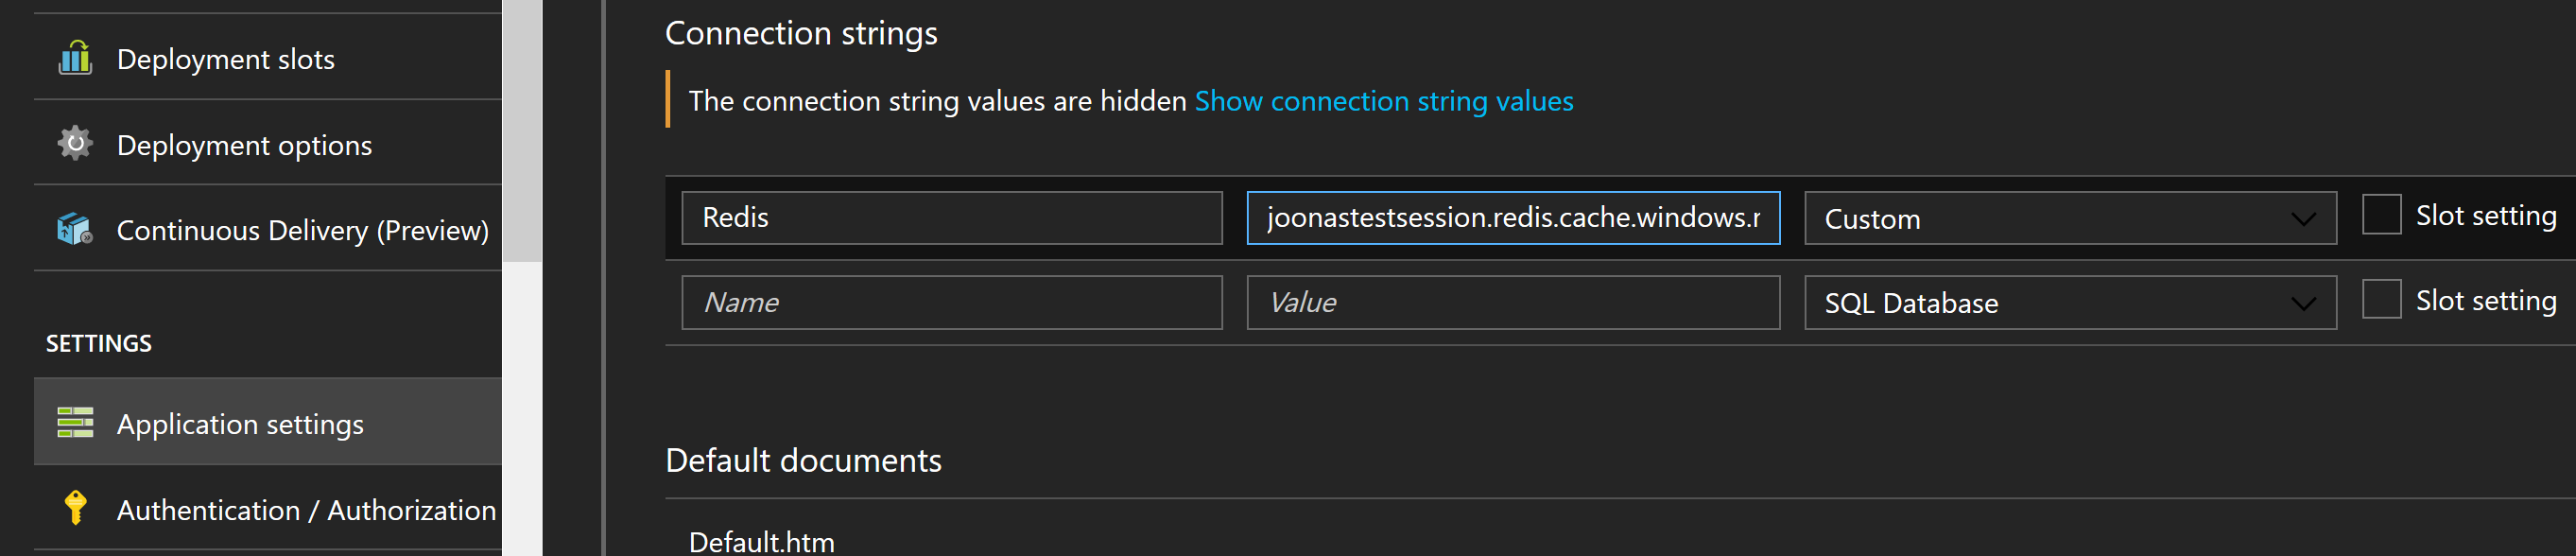
Make sure you use the Custom type. Do not use Redis Cache as the type. The ASP.NET Core configuration system will not find it if you use it.
Now the app will use Azure Redis Cache in production to store session data :)
We can of course use it for other caching purposes as well.
Conclusions
Using Redis to store session state in ASP.NET Core is super easy. Hopefully you found this article useful!